

Introduction
Welcome to Day 36 of the 90DaysOfDevOps challenge! Today, we'll dive into the world of Kubernetes (K8s) and explore the management of Persistent Volumes (PV) within your deployment. Persistent Volumes play a crucial role in preserving data across pod restarts and ensuring data integrity in stateful applications.
Understanding Persistent Volumes in K8s
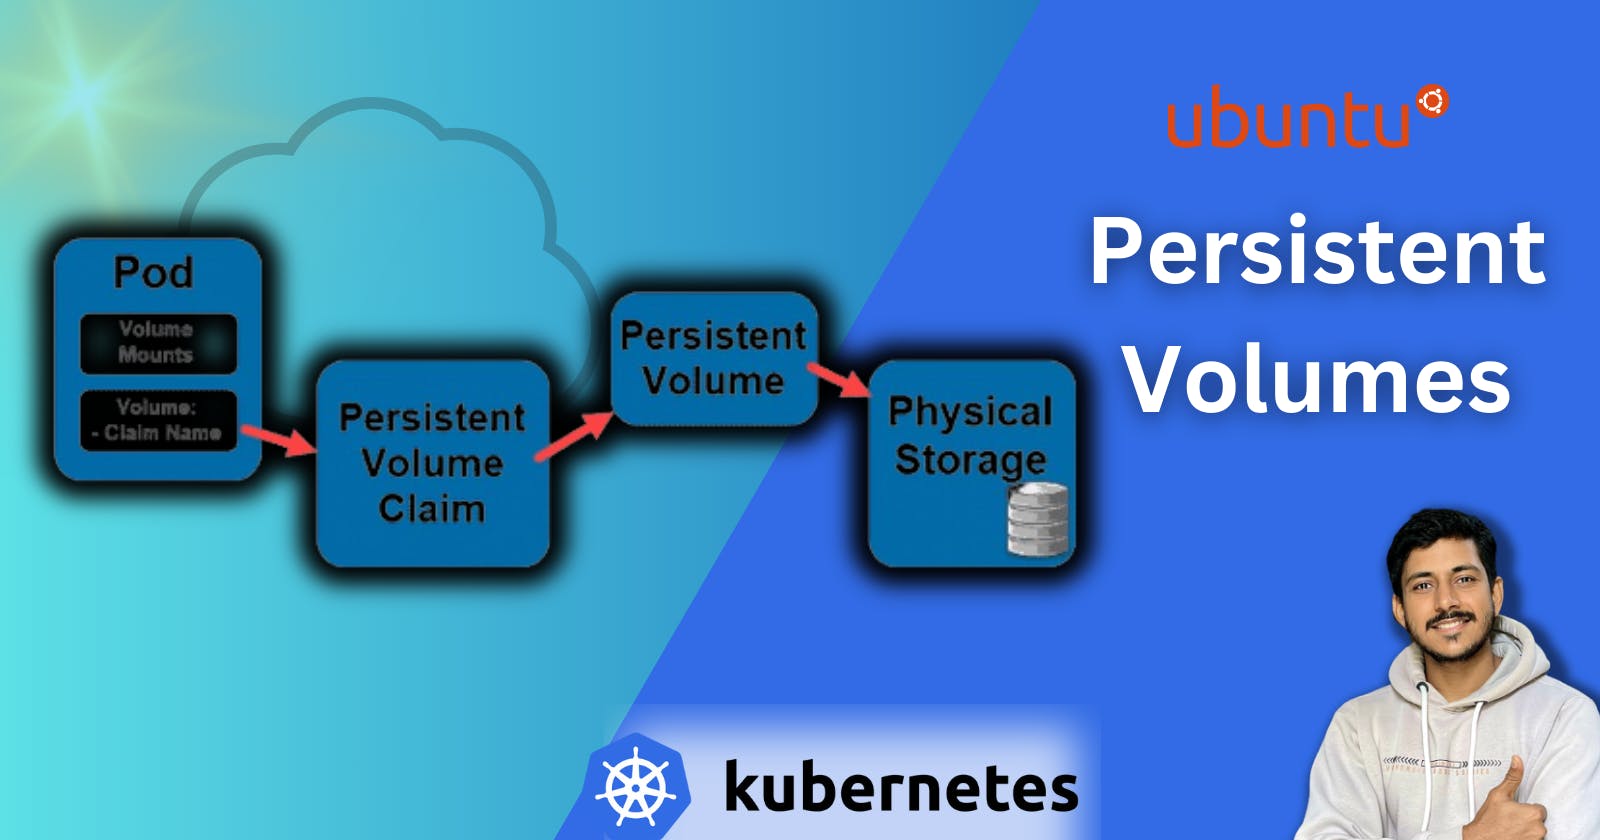
Managing storage is a distinct problem from managing compute instances. The PersistentVolume subsystem provides an API for users and administrators that abstracts details of how storage is provided from how it is consumed. To do this, we introduce two new API resources: PersistentVolume and PersistentVolumeClaim.
A PersistentVolume (PV) is a piece of storage in the cluster that has been provisioned by an administrator or dynamically provisioned using Storage Classes. It is a resource in the cluster just like a node is a cluster resource. PVs are volume plugins like Volumes, but have a lifecycle independent of any individual Pod that uses the PV. This API object captures the details of the implementation of the storage, be that NFS, iSCSI, or a cloud-provider-specific storage system.
A PersistentVolumeClaim (PVC) is a request for storage by a user. It is similar to a Pod. Pods consume node resources and PVCs consume PV resources. Pods can request specific levels of resources (CPU and Memory). Claims can request specific size and access modes (e.g., they can be mounted ReadWriteOnce, ReadOnlyMany, ReadWriteMany, or ReadWriteOncePod, see AccessModes).
Task 1: Adding a Persistent Volume to Deployment Todo App
Let's start by adding a Persistent Volume to our deployment for a Todo app. We'll go through the following steps:
Creating Persistent Volume (PV) and Persistent Volume Claim (PVC)
We have three YAML files for this task:
1. mysql-pv.yml
apiVersion: v1
kind: PersistentVolume
metadata:
  name: mysql-pv
spec:
  capacity:
    storage: 256Mi
  volumeMode: Filesystem
  accessModes:
    - ReadWriteOnce
  persistentVolumeReclaimPolicy: Retain
  hostPath:
    path: /home/ubuntu/two-tier-flask-app/mysqldata
2. mysql-pvc.yml
apiVersion: v1
kind: PersistentVolumeClaim
metadata:
  name: mysql-pvc
spec:
  accessModes:
    - ReadWriteOnce
  resources:
    requests:
      storage: 256Mi
3. mysql-deployment.yml
apiVersion: apps/v1
kind: Deployment
metadata:
  name: mysql
  labels:
    app: mysql
spec:
  replicas: 1
  selector:
    matchLabels:
      app: mysql
  template:
    metadata:
      labels:
        app: mysql
    spec:
      containers:
        - name: mysql
          image: mysql:latest
          env:
            - name: MYSQL_ROOT_PASSWORD
              value: "admin"
            - name: MYSQL_DATABASE
              value: "mydb"
            - name: MYSQL_USER
              value: "admin"
            - name: MYSQL_PASSWORD
              value: "admin"
          ports:
            - containerPort: 3306
          volumeMounts:
            - name: mysqldata
              mountPath: /var/lib/mysql
      volumes:
        - name: mysqldata
          persistentVolumeClaim:
            claimName: mysql-pvc
Make sure to replace the placeholders with your actual values.
Update Deployment File
After creating these files, update your two-tier-app-deployment.yml file to include the Persistent Volume Claim:
apiVersion: apps/v1
kind: Deployment
metadata:
  name: two-tier-app
  labels:
    app: two-tier-app
spec:
  replicas: 1
  selector:
    matchLabels:
      app: two-tier-app
  template:
    metadata:
      labels:
        app: two-tier-app
    spec:
      containers:
        - name: two-tier-app
          image: ansarshaik965/two-tier-flask-app:latest
          env:
            - name: MYSQL_HOST
              value: "10.98.19.211"  # Update with your MySQL service cluster IP
            - name: MYSQL_PASSWORD
              value: "admin"
            - name: MYSQL_USER
              value: "root"
            - name: MYSQL_DB
              value: "mydb"
          ports:
            - containerPort: 5000
          imagePullPolicy: Always
          volumeMounts:
            - name: mysqldata
              mountPath: /var/lib/mysql
      volumes:
        - name: mysqldata
          persistentVolumeClaim:
            claimName: mysql-pvc
Apply Changes
Apply the updated deployment using the command:
kubectl apply -f two-tier-app-deployment.yml
Verify
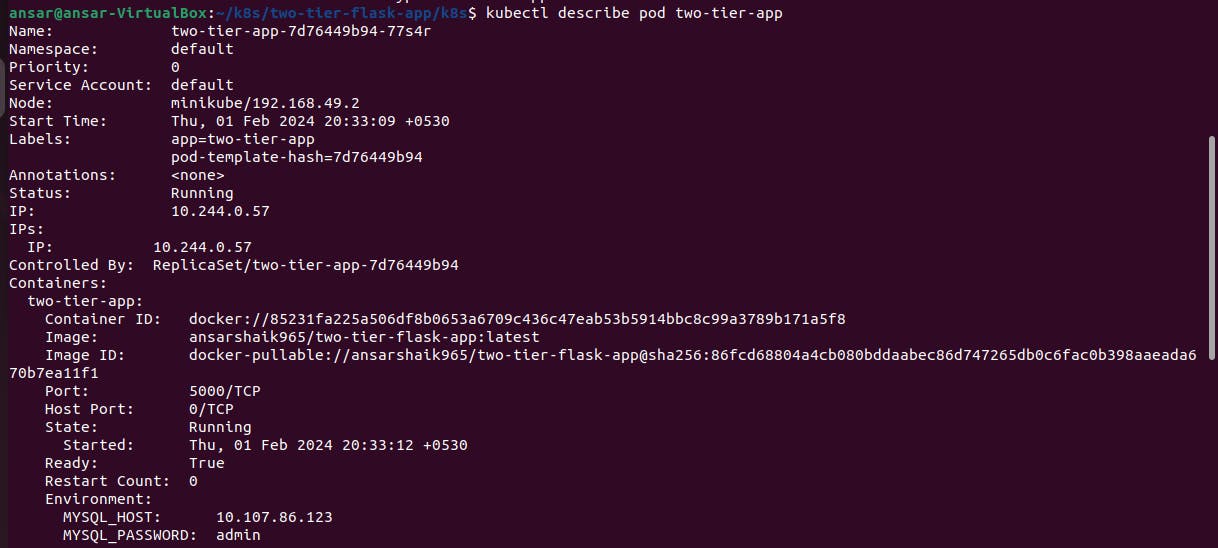
Verify that the Persistent Volume has been added to your deployment:
kubectl get pods
kubectl get pv
Task 2: Accessing Data in the Persistent Volume
Now that the Persistent Volume is connected to your deployment, you can access data within the Persistent Volume by connecting to a pod using the following command:
kubectl exec -it <pod-name> -- /bin/bash
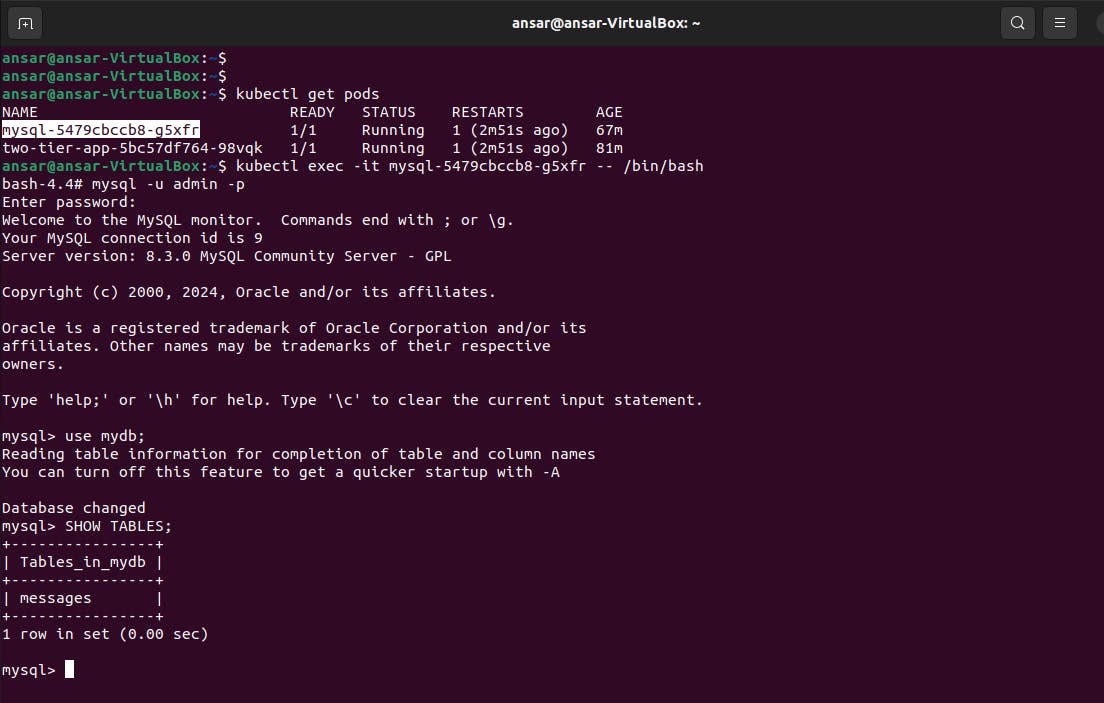
Replace <pod-name> with the actual name of your pod.
ERROR:
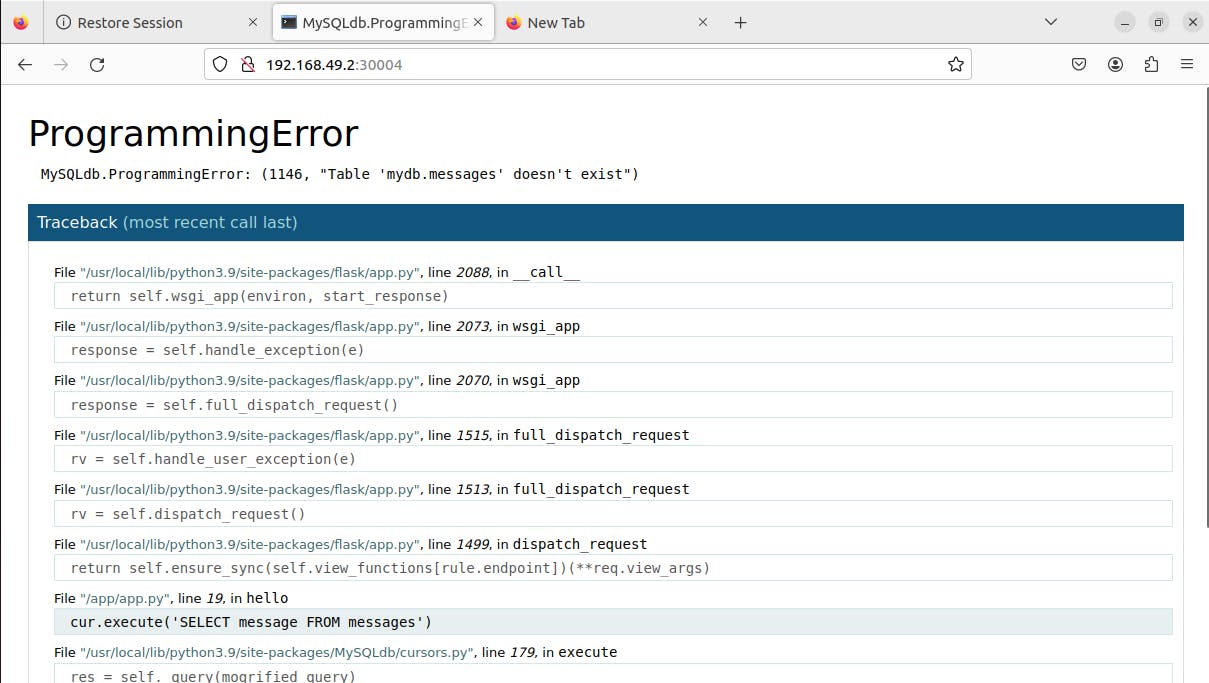
Q.How to create table in mysql container which is in k8s pod ?
To create a table in a MySQL container running in a Kubernetes pod, you can use various methods such as connecting to the MySQL container using a MySQL client or executing SQL commands using Kubernetes tools. Here's a step-by-step guide using kubectl and exec:
Connect to MySQL Container: Once the MySQL client pod is running, execute a shell inside the pod:
kubectl exec -it mysql-client-pod -- /bin/bashUse MySQL Client to Connect to MySQL Container: Inside the MySQL client pod, use the MySQL client to connect to the MySQL container:
mysql -h <mysql-service-name> -u <mysql-username> -p<mysql-password>Replace
<mysql-service-name>,<mysql-username>, and<mysql-password>with your MySQL service information.Create Table: Once connected to MySQL, you can execute SQL commands to create a table, similar to the previous example:
 CREATE TABLE your_table_name (
     column1 datatype1,
     column2 datatype2,
     ...
 );
Verify Table Creation: After creating the table, you can verify its existence:
SHOW TABLES;Exit MySQL Client Pod: Exit the MySQL client pod when you're done:
exit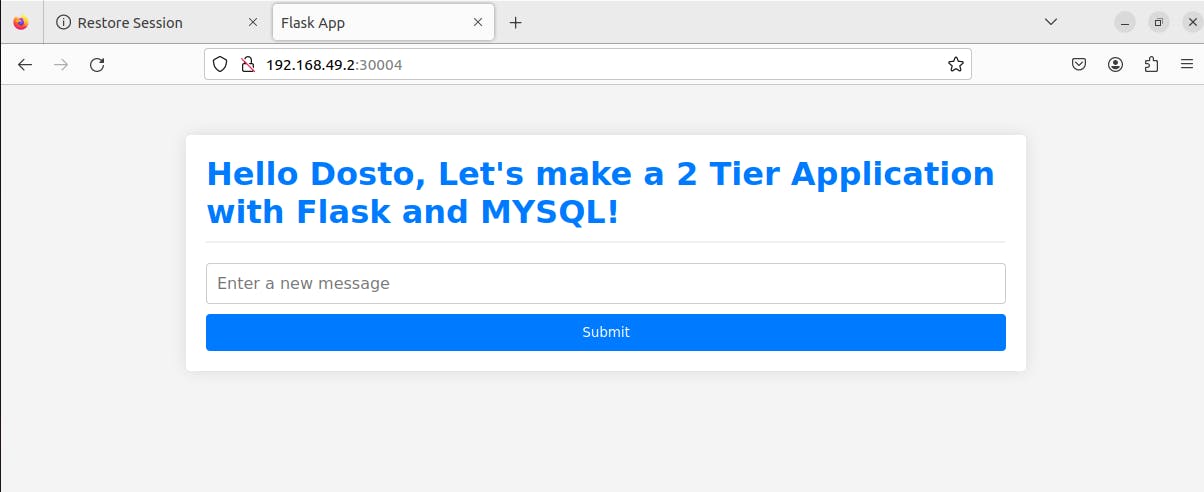
Q.Is there any other method , so that table will be created automatically like by using deployment.yml file or any other file.
Certainly! If you want the table to be created automatically when your MySQL container starts, you can use an initialization script. This script can be executed during the container startup process.
Here's an example of how you can modify your MySQL container's deployment configuration to include an initialization script:
Create Initialization SQL Script: Create an SQL script, for example,
init.sql, which contains the SQL commands to create your table:-- init.sql CREATE TABLE IF NOT EXISTS your_table_name ( column1 datatype1, column2 datatype2, ... );Replace
your_table_name,column1,datatype1, etc., with your actual table name and column definitions.Mount Initialization Script: Modify your MySQL container's deployment configuration (deployment.yml) to include the initialization script and mount it as a volume:
 # deployment.yml
 apiVersion: apps/v1
 kind: Deployment
 metadata:
   name: mysql-deployment
 spec:
   replicas: 1
   selector:
     matchLabels:
       app: mysql
   template:
     metadata:
       labels:
         app: mysql
     spec:
       containers:
       - name: mysql-container
         image: mysql:latest
         env:
         - name: MYSQL_ROOT_PASSWORD
           value: your_root_password
         volumeMounts:
         - name: init-scripts
           mountPath: /docker-entrypoint-initdb.d
       volumes:
       - name: init-scripts
         configMap:
           name: mysql-init-scripts
In this example, the
init-scriptsvolume is mounted to the/docker-entrypoint-initdb.ddirectory, which is the directory where MySQL automatically looks for initialization scripts.Create ConfigMap for Initialization Script: Create a ConfigMap that includes your initialization script:
 # mysql-init-scripts-configmap.yml
 apiVersion: v1
 kind: ConfigMap
 metadata:
   name: mysql-init-scripts
 data:
   init.sql: |
     CREATE TABLE IF NOT EXISTS your_table_name (
         column1 datatype1,
         column2 datatype2,
         ...
     );
Apply the ConfigMap to your cluster:
kubectl apply -f mysql-init-scripts-configmap.ymlThis ConfigMap contains the initialization script.
Apply Deployment: Apply the modified deployment configuration:
kubectl apply -f deployment.yml
This approach ensures that the table creation script is executed automatically when the MySQL container starts. The script is mounted into the container using a ConfigMap, and MySQL automatically runs scripts from the /docker-entrypoint-initdb.d directory during container initialization. Adjust the script and deployment configurations according to your specific requirements.
Delete a table in MySQL, you can use the DROP TABLE command. Here is an example SQL command to drop a table:
DROP TABLE your_table_name;
Replace your_table_name with the actual name of the table you want to delete.
Congratulations! You've successfully managed Persistent Volumes in your deployment. Stay tuned for the next task in the 90DaysOfDevOps challenge. Happy coding! 🚀