


Introduction:
Welcome back to the 90DaysOfDevOps challenge! On Day 17, we embarked on an exciting journey by deploying a Flask app on an EC2 instance using a Dockerfile. In this blog post, we'll explore the steps taken, the Dockerfile used, and the magic behind bringing our Flask application to life on the cloud.
Dockerizing the Flask App:
To kickstart the deployment process, we crafted a Dockerfile, a recipe that defines the environment and instructions for running our Flask application within a Docker container. Let's break down the key elements of the Dockerfile:
# Use an official Python runtime as a parent image
FROM python:3.9.18-slim

# Set the working directory to /app
WORKDIR /app

# Copy the current directory contents into the container at /app
COPY . /app

# Install any needed packages specified in requirements.txt
RUN pip install --no-cache-dir -r requirements.txt

# Make port 5000 available to the world outside this container
EXPOSE 5000

# Run app.py when the container launches
CMD ["python", "app.py"]
Understanding the Dockerfile:
Base Image Selection:
We started with an official Python runtime image with version 3.9.18-slim as our base image. Choosing an official image ensures reliability and a well-configured environment.
Setting the Working Directory:
- The
WORKDIR /appcommand sets the working directory within the container to/app, creating a clean and organized structure.
- The
Copying Application Files:
- The
COPY . /appcommand copies the contents of the current directory into the/appdirectory within the container. This includes our Flask application code and any other necessary files.
- The
Installing Dependencies:
- With
RUN pip install --no-cache-dir -r requirements.txt, we installed the required Python packages specified in therequirements.txtfile. This step ensures that our Flask app has all the dependencies it needs.
- With
Exposing Port:
- The
EXPOSE 5000command informs Docker that the container will listen on port 5000. It doesn't actually publish the port; it serves as documentation for developers.
- The
Launching the App:
- Finally,
CMD ["python", "app.py"]specifies the command to run when the container starts, launching our Flask app.
- Finally,
Deployment on EC2:
After creating the Dockerfile, we proceeded to deploy the Dockerized Flask app on an EC2 instance. The general steps include:
SSH into the EC2 Instance:
- Use SSH to connect to your EC2 instance.
Clone the Repository:
- Clone the repository containing the Dockerfile and Flask app code onto the EC2 instance.
Build and Run the Docker Container:
- Execute commands to build the Docker image and run the container on the EC2 instance.
Pushing to DockerHub:
After successfully building the Docker image, we pushed it to DockerHub for easy access and distribution. Follow these steps:
a. Log in to DockerHub using the following command:
docker loginb. Enter your DockerHub username and password when prompted.
c. Tag your local Docker image with your DockerHub username and repository name:
docker tag <local_image_name> <dockerhub_username>/<repository_name>:<tag>d. Push the image to DockerHub:
docker push <dockerhub_username>/<repository_name>:<tag>Ensure your DockerHub repository is set up beforehand.
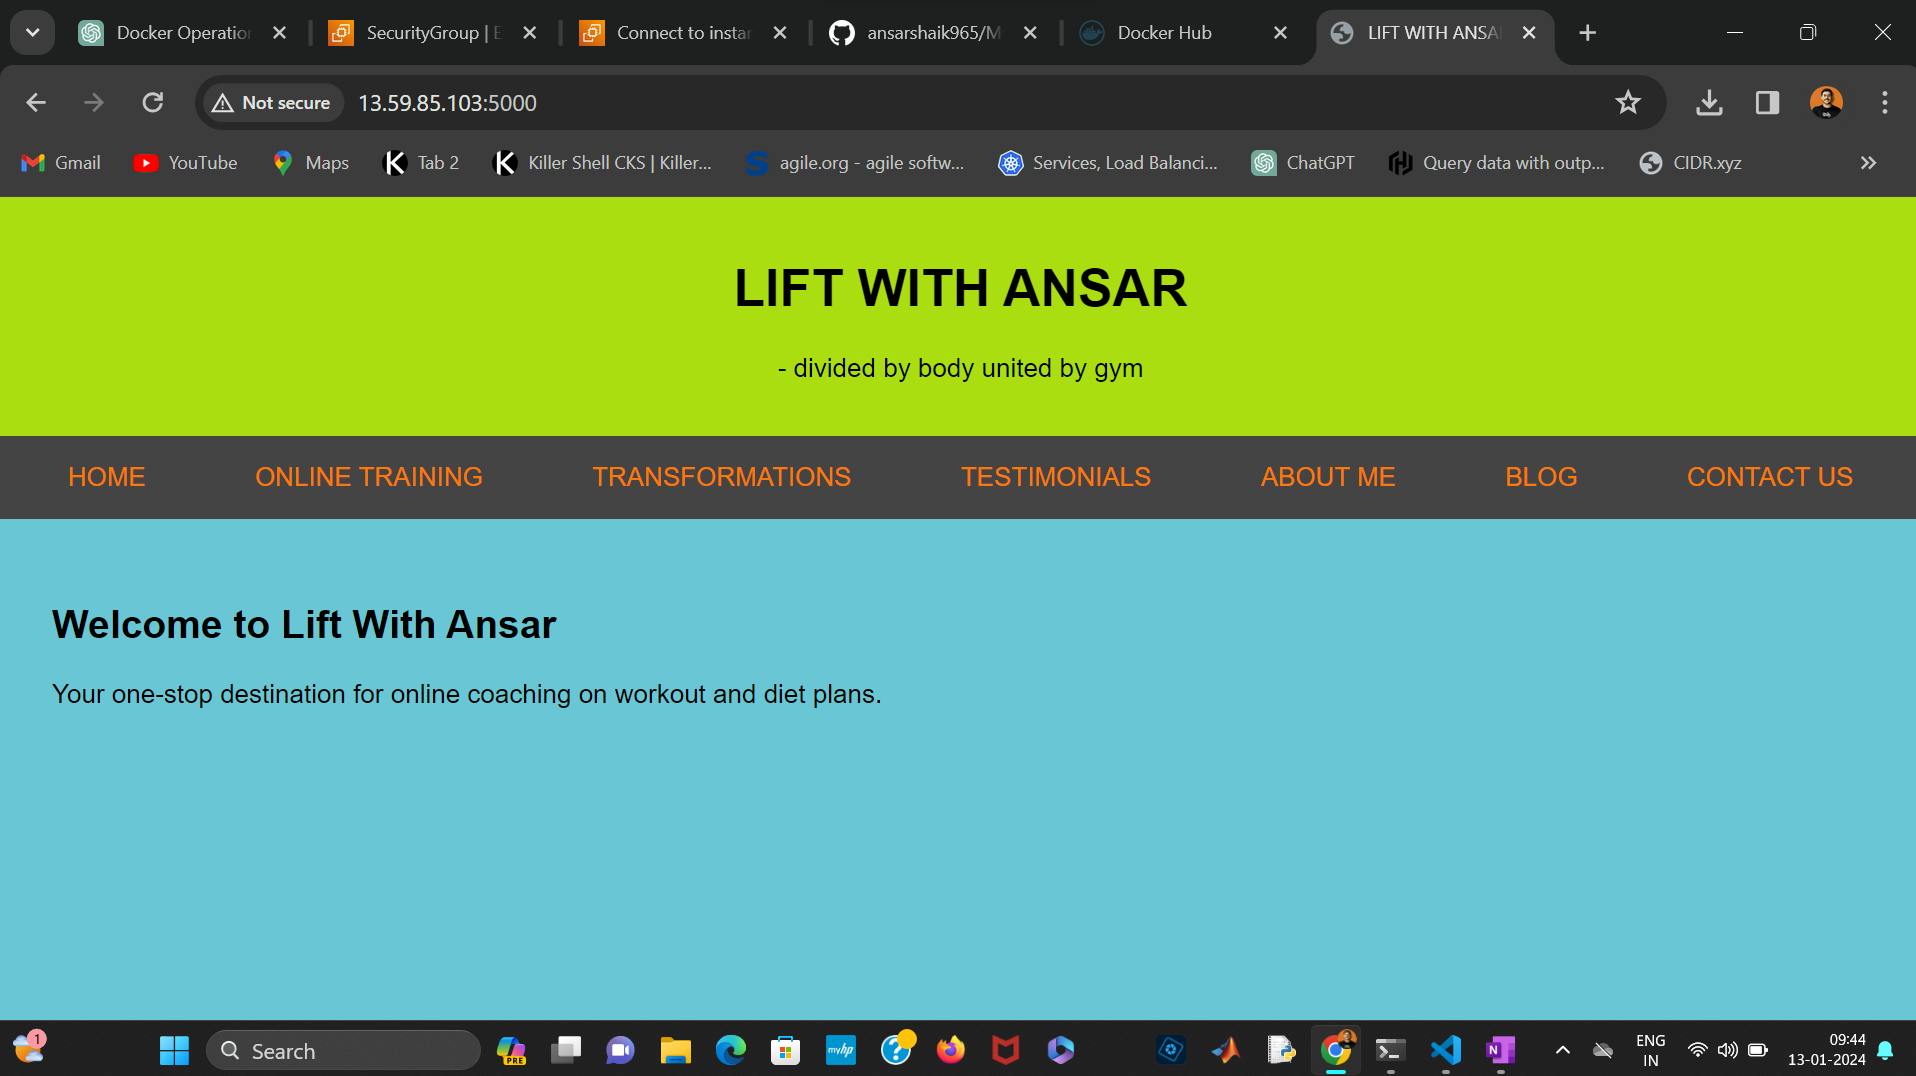
With these steps completed, our Flask app is now up and running on an EC2 instance, encapsulated within a Docker container. This approach offers scalability, reproducibility, and ease of deployment—a powerful combination for efficient DevOps practices.
Explore the Code on GitHub:
Check out the complete code and the Dockerfile on GitHub. Feel free to fork, clone, and experiment with the setup.
Conclusion:
Day 17 of the 90DaysOfDevOps challenge introduced us to the world of Dockerized Flask applications on an EC2 instance. Leveraging Docker for deployment provides a consistent and portable environment, making it an invaluable tool in modern DevOps workflows. Stay tuned for more exciting challenges and insights as we continue our DevOps journey!